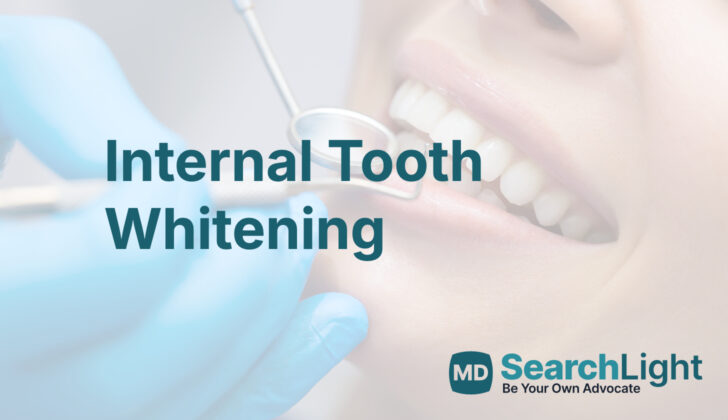
Overview of Internal Tooth Whitening
Tooth discoloration, or having teeth change color, is a common concern among patients who want to improve the look of their front teeth. The stains or discoloration on teeth can be on the surface, which we call “extrinsic”, or they can be deeper inside the tooth, which we call “intrinsic”. Knowing what caused the discoloration is important so we know the best treatment to use.
External stains, or extrinsic stains, happen when color from food and drinks, like coffee, tea, and wine, or from habits like smoking, stick to the surface of the tooth. Intrinsic stains, on the other hand, happen inside the tooth. This can happen while the tooth is developing due to conditions like dental fluorosis (too much fluoride) or amelogenesis imperfecta (when tooth enamel doesn’t form properly). It can also happen after a tooth has come in because of damage, death of the tooth, or leftover materials from root canal treatment.[1]
Internal, or intrinsic, tooth whitening can make discolored teeth look better without changing the shape or size of the tooth. This method is also less expensive compared to other treatments, like veneers or crowns that cover the tooth. In this process, substances like hydrogen peroxide or carbamide peroxide, are able to go inside the tooth and break apart the things causing the discoloration, making it look whiter.[2]
Nonvital teeth, or dead teeth, can be whitened by different methods: the walking bleach technique, inside-outside bleaching, and in-office bleaching.[3] In both the walking bleach and inside-outside techniques, the teeth are expected to lighten in a similar manner. The walking bleach approach blocks off the top of the tooth, which means patients don’t need to use trays at home. For inside-outside bleaching to work, patients must follow instructions about how to use bleaching trays and clean the top of the tooth with a special brush between dentist visits.[4] Internal bleaching works best in teeth discolored due to damage or tooth death rather than from materials used in dental treatments.[2]
We’ll now discuss how to plan and carry out internal tooth whitening using an example of a 28-year-old man who had this procedure done on a nonvital or dead front tooth using the walking bleach technique.
Why do People Need Internal Tooth Whitening
Internal tooth whitening is a method used to whiten a tooth that has turned discolored from the inside. This can happen if the tooth has suffered some kind of injury or infection, which has caused it to die. This treatment is usually performed after a root canal treatment, which is a procedure to repair and save a badly damaged or infected tooth.
The insides of teeth can change color for a variety of reasons. These include bleeding inside the tooth, death of the internal soft tissue of the tooth (pulp), leftover bits of this tissue, and leftover materials from root canal treatment. The leftover tissue or materials can seep into the tiny tubes in the hard layer of the tooth (dentin), causing it to darken.
If the internal part of the tooth bleeds due to injury, this can cause the tooth to temporarily turn pink. Over time, the breakdown of blood cells releases a substance called iron, which reacts with a chemical produced by bacteria to form a black compound, giving the tooth a grayish hue. Alongside this, the breakdown of proteins in a dead pulp could also lead to discoloration. The longer the pulp is left to decay, the greater the discoloration of the tooth.
If the dentist does not fully clean the tooth during root canal treatment, bits of pulp or filling material may remain in the tooth chamber. This leftover tissue or material can cause further discoloration of the tooth. The effectiveness of internal tooth whitening in these cases can be affected by the type of material left in the tooth and how long it has been in contact with the tooth. Any remaining materials need to be fully removed before whitening can proceed.
Preparing for Internal Tooth Whitening
Before having their teeth whitened, it’s important that patients understand that they may not get back the natural color of their teeth. They also need to be aware of potential complications, even if they are unusual.
One such rare complication is external cervical resorption, associated with internal teeth whitening. This issue is typically linked to orthodontic treatment, surgical procedures, and teeth bleaching]. Usually, a person won’t feel any symptoms from it. In fact, it’s often accidentally found during x-ray scans. It shows up as a clean, dish-like spot near the place where the tooth root and tooth surface meet. On rare occasion, the tooth might be sensitive, bleed a lot if poked, or become painful if touched and gums near that tooth may swell.
There are certain factors which increase the risk of cervical resorption. If you have a history of dental injury and tooth whitening, you are at a higher risk. The exact cause isn’t clear, but it is recommended to use a lower-concentration bleaching agent in order to reduce any chances of this issue. The European Union, for instance, suggests using tooth whitening products that contain or release 6% or less of hydrogen peroxide. But, not all international guidelines are the same and some still permit higher concentration levels.
Before starting the whitening treatment, certain things need to be checked. Most importantly, your teeth and surrounding teeth need to be in good health, including the status of root canal treatments, if any. It’s also important to know that it’s uncertain how much a tooth’s color will change after whitening. If there are cavities or any other problems with the nearby teeth, those should be addressed after finishing whitening. Before and after photos are also a good idea so you can see the change in your teeth’s color.
How is Internal Tooth Whitening performed
Whitening toothpastes and treatments often use hydrogen peroxide as the main ingredient which can be directly applied or released from other compounds like carbamide peroxide or sodium perborate. Both carbamide peroxide and hydrogen peroxide often result in better teeth color compared to sodium perborate. Hydrogen peroxide releases oxygen that breaks down pigment molecules into smaller pieces. These new, smaller pigments reflect light differently, which gives the appearance of whiter teeth. This whitening effect can be increased with heat and light.
Now, let’s talk about some teeth whitening techniques:
1. Walking Bleach Technique:
In this method, your tooth is first isolated with a rubber barrier and any old fillings are removed. The tooth is then cleaned with a disinfecting solution. A protective layer is placed on the inside of your tooth to provide a seal, reducing the risk of tooth breakage and resorption, where your body breaks down or absorbs the tooth. A damp cotton ball with high concentration hydrogen peroxide is then put inside your tooth and a temporary seal is placed over it. You will then need to come back every 2 weeks to assess the color of your teeth and repeat this bleaching process until no further whitening is achieved. After each treatment, your dentist will take pictures and X-rays to monitor for any possible complications. A permanent seal is applied at your last appointment.
2. Inside-Outside Bleaching Technique:
This technique involves applying a bleaching agent both inside and outside of your tooth. Unlike the walking bleach, this method leaves the tooth open during treatment. You will wear a mouthguard over the treated area at night. A low-concentration whitening solution is applied to both the inside and outside of your tooth. You will then follow up with your dentist every 3 days to monitor the color change. Once your desired shade is achieved, your tooth is cleaned and a temporary seal is placed. However, this method requires more responsibility as it involves taking home trays and making sure to return for a closure appointment. Also, there might be some additional costs for the tray production.
3. In-Office Bleaching Technique:
This technique, often used for whitening both living and non-living teeth, starts off similar to the walking bleach method. The tooth is isolated, accessed, and the root is sealed. A higher concentration of hydrogen peroxide is applied and then washed off after 20 minutes. This process is repeated. Due to the higher concentration used, you’ll need a follow-up appointment for a permanent closure of the treated tooth.
What Else Should I Know About Internal Tooth Whitening?
Dental discoloration, especially in a non-living or ‘nonvital’ tooth can significantly impact a person’s smile. However, a tooth bleaching method using hydrogen peroxide, known as the ‘walking bleach’ technique, can help restore the color of the tooth. This solution is often preferred due to its conservative approach—meaning it doesn’t require additional tooth removal—and it’s more affordable compared to other treatments.
A case can help illustrate this point. A 28-year-old man with a history of high blood pressure, but otherwise healthy, was bothered about the appearance of his darkened tooth. He had previously had a root canal treatment on one of his upper front teeth, which discolored a month after the procedure. In his past, he had another root canal on a different tooth, after which he got a porcelain-metal crown to improve the tooth’s appearance. Though he was quite happy with the results of that treatment, he wanted to explore other options before deciding to get another crown.
While crowns can be effective at restoring the appearance of teeth, they require the removal of some of the tooth’s structure, which can shorten the tooth’s lifespan. Crowns can also be quite expensive compared to less invasive treatments. As an alternative, the dentist suggested internal tooth bleaching using the walking bleach technique, which could bring similar results without the drawbacks of a crown.
The patient’s discolored tooth was matched to a C4 VITA shade—a measure of tooth color—at the initial visit. Then, a 40% hydrogen peroxide solution was applied inside the tooth across multiple two-week periods. The tooth’s color improved significantly after the second application.
The tooth’s color improved from C4 VITA to C3 VITA after the first bleaching, and then to C1 VITA after the second bleaching. Importantly, the tooth remained at C1 VITA after the third bleaching, suggesting that the result was durable. Throughout this time, the patient reported zero discomfort, and the tooth’s structure remained intact. After six months, his tooth had maintained its improved color. The patient was very pleased with the outcome.