Overview of Thumb Spica Splinting
Acute hand and wrist injuries can happen to anyone, regardless of their age or how active they are. These injuries can happen from normal daily activities like low-energy trauma (minor injuries), such as falling right onto the ground, especially amongst older individuals. They can also occur during recreational activities or professional sports events.
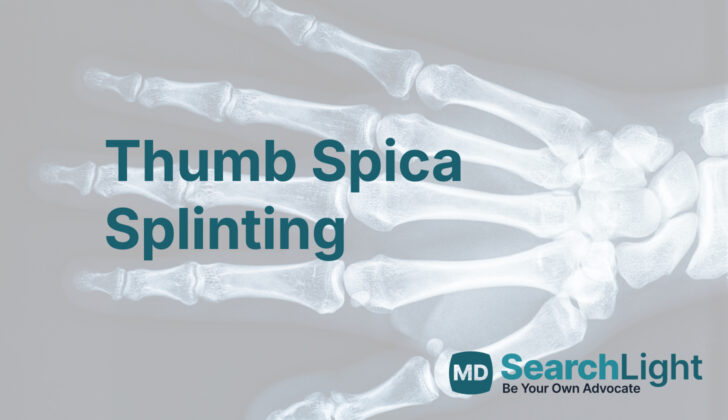
Wrist splinting, or the use of a device to support your wrist, is a crucial part of treating these injuries. This picture shows a Thumb Spica Splint which is specifically designed to provide support. This procedure gives your wrist and joints around it stability and might be all you need to recover from minor hand and wrist injuries.
Besides, splinting can also be used temporarily before a surgery. The technique provides support, allows for swelling, and protects the hand or wrist from further injuries to the soft tissues (like muscles, tendons, and ligaments) before a surgery. Another great thing about splints is that they can be removed whenever needed for doctors to further examine the injury or for repeated imaging. This is why they are considered an excellent alternative to rigid fiberglass or plaster castings that cannot be removed easily.
Anatomy and Physiology of Thumb Spica Splinting
The radiocarpal joint, also known as the wrist joint, is a type of joint that connects the forearm and the hand. It’s kind of like a modified ball-and-socket joint and is formed by the joining of several bones: the distal radius (end of the forearm bone), the articular disc, and three bones in the wrist known as the scaphoid, lunate, and triquetrum. This setup allows the wrist to flex (bend), extend (straighten), abduct (move away from the body), and adduct (move towards the body).
Interestingly, the other forearm bone, the ulna, is not part of the wrist joint. However, it does connect with the end of the radius to form another joint named the distal radioulnar joint.
Attached to the wrist joint, there’s a robust ligament known as the radiocarpal ligament. You can find this ligament on the back and front surfaces of the wrist. It helps to connect the radius to the bones at the end of the wrist. The entire joint is cloaked in thick, fibrous connective tissue filled with a lubricating substance known as synovial fluid.
Wrist fractures are quite rare, making up only about 1% of upper limb fractures in children and adolescents. The most commonly fractured bone in the wrist is the scaphoid, often as a result of falling on an outstretched arm. However, many fractures can go unnoticed because wrist bones are made up of cartilage and complex to identify in X-ray images.
Speaking of the scaphoid bone, it’s significant for several reasons. It’s the most lateral (outer) bone in the row of bones nearest to the forearm. This bone is coated with a type of tissue called articular cartilage, which acts as a bridge connecting the two rows of wrist bones. If the scaphoid bone fractures, there’s a risk of non-healing (nonunion), which can lead to ischemia (lack of blood flow) and avascular necrosis (bone death) in the upper portion of the scaphoid. This is why the fracture is typically managed with a special cast (thumb spica casting) for several weeks.
Now, about the soft tissues of the wrist. Two tendons– the abductor pollicis longus and abductor pollicis brevis– are responsible for moving the thumb away from the hand. Two other muscles, the extensor pollicis longus and extensor pollicis brevis, control the thumb’s extension or the ability to straighten. These important movements are essential for hand function. Issues such as sprains, tendon ruptures, and tendon inflammation can arise due to traumatic injuries or repetitive use of these tendons.
An example is De Quervain tenosynovitis, a condition affecting the abductor pollicis longus and extensor pollicis brevis tendons. Its cause was once thought to be inflammation, but it is now believed to be due to changes in tissues and blood vessels. The tendons’ protective sheaths often thicken, causing them to get trapped. Treatments, like wearing a thumb spica brace, can offer short-term pain relief.
Lastly, the ulnar collateral ligament (UCL) of the thumb plays a significant role in providing stability against various stresses on the thumb. It can get injured from repetitive movements or falls, leading to conditions like “gamekeeper’s thumb” or “skier’s thumb.” In these cases, thumb spica braces can also provide support and prevent reinjury.
Why do People Need Thumb Spica Splinting
A thumb spica splint is a tool used by doctors to support and protect the thumb and wrist area when they have been injured. This could be necessary due to a few different types of injuries including:
* Broken bones and damage to the protective cushioning between bones (the cartilage), specifically in bones called:
* Scaphoid
* Triquetrum
* Hamate hook
* Lunate
* 1st metacarpal
* Injuries to soft tissues (like muscles, tendons, and ligaments), such as:
* Damage to the UCL (a ligament in the thumb)
* De Quervain tenosynovitis, which is when the coverings of the tendons on the thumb side of the wrist are swollen
* Closed thumb extensor and abductor tendon injuries, which involves damage to the tendons that straighten and move your thumb away from your palm
* Age-related changes in the thumb such as:
* Carpometacarpal thumb osteoarthritis or basal joint arthritis, a condition where the joint at the base of the thumb wears out
* After certain types of hand surgeries, to help keep the hand and wrist stable while it heals
It’s important to note that a thumb spica splint is not used for a condition known as carpal tunnel syndrome, which is a common condition that causes numbness, tingling, or weakness in the hand.
When a Person Should Avoid Thumb Spica Splinting
There are no specific reasons why a person couldn’t wear a thumb spica splint – a type of cast worn on the hand to stabilize the thumb. However, swelling or changes to the tissue under the splint might lead to complications. These might include sore spots from pressure, tissues getting ‘strangled’ or cut off from blood supply, or compartment syndrome, which is a painful and dangerous condition that involves increased pressure in an arm or leg.
Equipment used for Thumb Spica Splinting
There are two main types of thumb spica splints – a type of brace to support your thumb when it’s been injured. These types include malleable prefabricated and fiberglass types. Prefabricated thumb spica splints have adjustable straps and can be fitted right away to match the size of your hand. You can usually find these at stores selling medical supplies, sporting goods, and even large grocery stores.
The fiberglass splints, on the other hand, need to be assembled with specific materials. This involves materials like plaster or padded fiberglass, plaster wool (a type of material used to pad the splint for comfort), a bucket of water, scissors, a crepe bandage or stockinette (stretchable fabrics used to cover and protect your skin), roll padding, and non-sterile gloves.
This equipment is needed to create a fiberglass splint that will properly support your injured hand or wrist and make sure that you’re as comfortable as possible while wearing it.
Who is needed to perform Thumb Spica Splinting?
A thumb spica splint is a device used to support and protect your thumb if you’ve experienced trauma. It’s something that can be used in a variety of settings – whether at an accident site, a hospital, or a doctor’s clinic. It can be applied by different healthcare professionals, such as a doctor, a nurse, or a medical technician. What’s good to know is that it’s not a complex procedure and only one person is needed to apply this splint on your thumb. If you’ve hurt your thumb, a splint might be used to help it heal properly and prevent further damage.
Preparing for Thumb Spica Splinting
A splint that extends from your thumb to either your mid-forearm or just above your elbow, known as a “thumb spica splint”, can be used when you have a fractured bone in your wrist (specifically the scaphoid bone). The type that goes up to your elbow might speed up healing in the first 4 to 6 weeks because it reduces forces between your two big forearm bones (radius and ulna) that could disturb your injured scaphoid. However, by the time your splint comes off, both the longer and shorter thumb spica splints would be equally effective in treating such a fracture.
If you fracture your thumb at the base, often referred to as Bennet or Rolando fractures, a simple short-arm thumb spica splint is sufficient and efficient. There’s a bit of debate, though, about how effective this type of splint is in treating an inflammation of the sliding tissues around the tendons in your thumb (known as “De Quervain tenosynovitis”), either with or without an additional corticosteroid injection.
Regardless of its purpose, a good splint always maintains balance between function and the greatest possible mobility for your unaffected body parts, like your fingers, upper arm, and shoulder. Plus, it should let you feel through your skin as much as possible. Pressure from the splint must be equal across your wrist and should not create unnatural bends or bulges in your hand and forearm. It is crucial that you have enough pain relief before and during the time the splint’s applied.
How is Thumb Spica Splinting performed
When applying a thumb spica splint, which is a special kind of bandage used to support the thumb after an injury, certain steps are followed:
1. Firstly, the doctor will perform a thorough physical exam before starting the splinting process.
2. You’ll be asked to rest your elbow on a table with your forearm in a relaxed, straight position.
3. Your thumb should also be in a relaxed, natural position.
4. Your doctor will put on gloves that aren’t sterile – this means they’re clean but not completely free from all germs.
5. They’ll then slip on a sock-like material (called a stockinette) onto your thumb.
6. A second stockinette or crepe bandage (a kind of stretchy bandage) will be wrapped around your arm from your knuckles (MCP joints) to the middle or lower part of your forearm. The length of this bandage will depend on the nature and location of your injury, and how much support is needed.
7. The doctor will then wrap soft padding from the MCP joints to the forearm, making sure it covers a slightly larger area than the splinting target. The padding material will be torn at intervals to make sure it doesn’t press too tightly on the tissue.
8. They’ll wrap another layer of padding around your thumb on top of the stockinette, making sure to smooth out any folds.
Next, a plaster cast is prepared: the doctor will take a piece of plaster about 4 inches wide and 8 layers thick that’s big enough to cover the area from the tip of your thumb to your forearm. They’ll then soak the plaster in lukewarm water and apply it to the side of your forearm and thumb. The plaster should be applied smoothly, without creating any ridges or indentations. It is then covered with a soft wrap material (like ace wrap) that lies between the plaster and the outer-most layer of wrap.
After the process, a second physical exam will be carried out to ensure that there’s been no change to blood flow or nerve function in the area of treatment.
Lastly, it’s important that you follow the doctor’s advice on how to care for your splint properly. You should keep the splint and injured arm dry and watch out for complications such as increasing pain, numbness or tingling, and changes in finger color. If you notice any of these symptoms, it could be a sign of compartment syndrome, a serious condition
that needs immediate medical attention. Be sure to follow up as advised by your doctor.
Possible Complications of Thumb Spica Splinting
If you’re receiving a splint, it’s crucial to understand that complications, like compartment syndrome, can happen. Compartment syndrome is the most serious issue you might encounter, and it comes with symptoms like worsening pain, numbness, tingling, and changes in skin color. You should immediately seek medical care if you experience these symptoms.
There are also less severe problems that might occur, including joint stiffness, thermal injuries (burns from hot or cold objects), pressure sores, infections, and dermatitis (skin inflammation). Any sign of these should be reported to your healthcare provider for proper action. Your splint should only be worn for the time period your doctor recommends or replaced right away if any of these complications arise.
There are also some signs of improper fit of the splint or orthotic device. These include pale skin, slow return of blood flow after pressure is applied (poor capillary refill), and pain when the splint is applied. Any of these could mean the device is interfering with your body’s normal structure and needs to be adjusted or replaced.
What Else Should I Know About Thumb Spica Splinting?
Using a brace, specifically a thumb spica splint, is a great way to treat hand injuries involving the thumb, wrist and middle part of the hand. This method is affordable, easy to learn, and practical for busy individuals. Braces are user-friendly both for the doctor and the patient. Plus, they can be easily taken off when progress needs to be evaluated during the treatment process.
After the brace is fitted, the doctor will explain how to look after it. It’s crucial that both the hand and the brace are kept clean and dry. The doctor will also ask the patient to relax, put ice, and raise the injured area immediately after the injury to prevent swelling. A follow-up appointment is typically scheduled within one or two weeks after the brace is applied. However, depending on the type and seriousness of the injury, this duration may change.